Cherry and Blueberry Pie
PREP TIME: 3-4 HR | COOK TIME: 65 MIN | YIELD: 8 SLICES
Scrumptious Moment - 4th of July, 2020
I made this for the first time for my family on Fourth of July weekend while we were all staying in Lake Arrowhead, CA. I have spent the holiday weekend there for as long as I can remember, and everyone loved this recipe so much it has become part of the tradition!
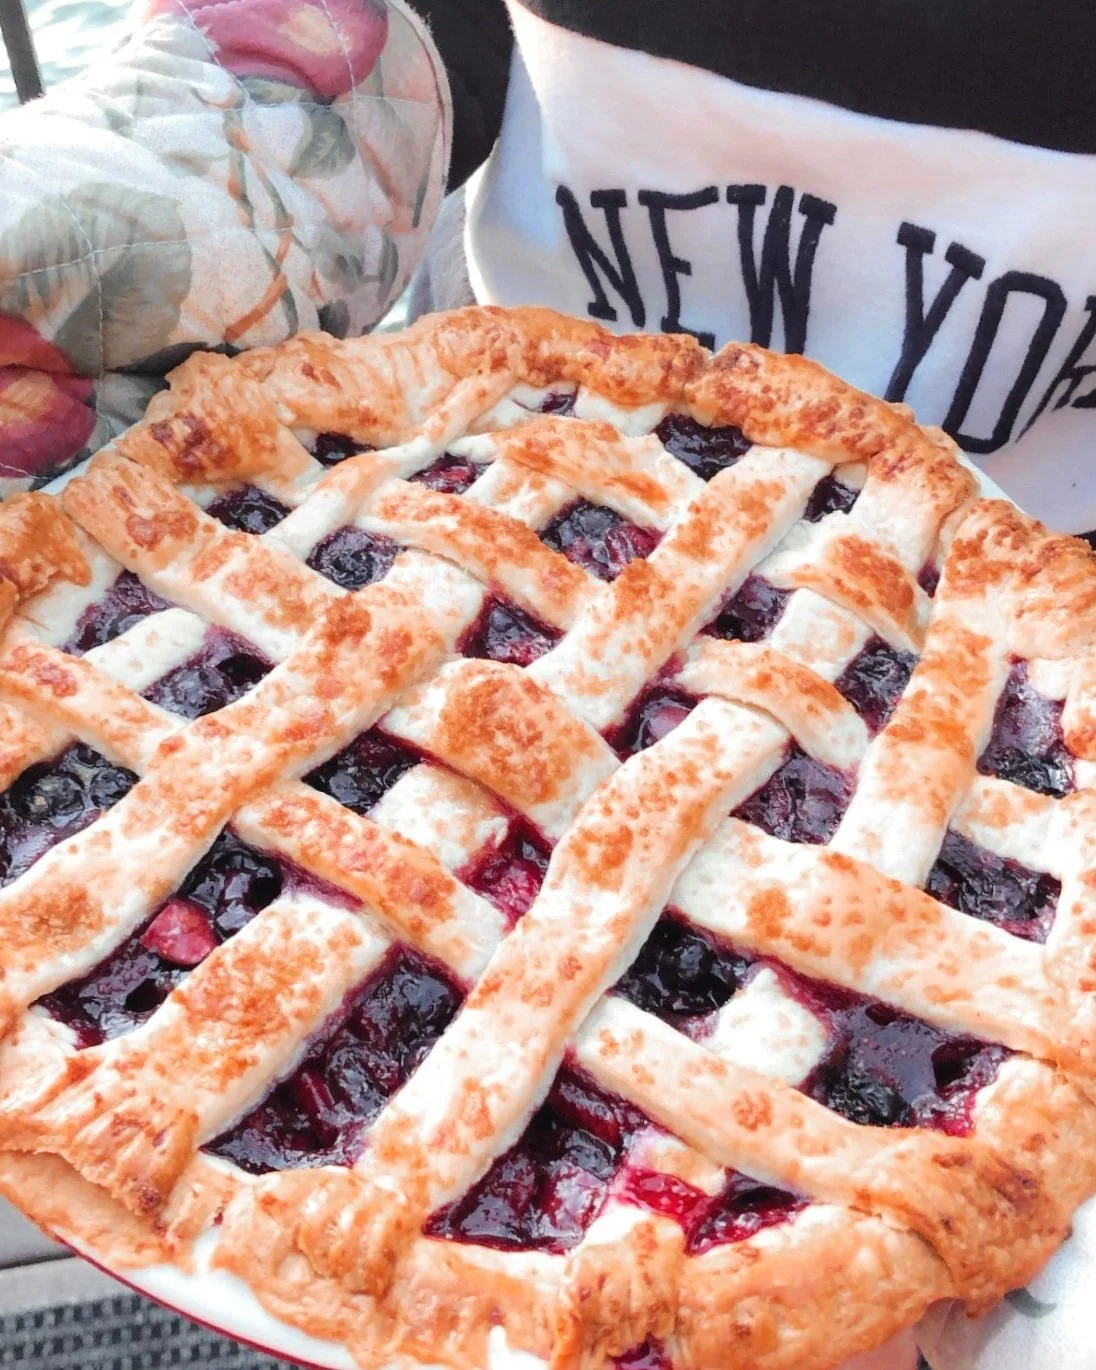
CHERRY AND BLUEBERRY PIE
This American classic is perfect for the Fourth of July cookout or your next summer picnic! Not only does it present beautifully, but every bite bursts with flavor from the fresh and juicy blueberries and cherries already half-cooked into a jam, and the golden-brown buttered crust. Baking a pie can be intimidating because there are many moving parts and it take lots of patience, but this recipe ensures detailed instructions every step of the way to guarantee you bake a pie that looks and tastes straight out of Marie Callender’s!
BERRY FILLING
One of the biggest challenges in baking a pie that is filled with fruit is avoiding the watery consistency. There is nothing worse, after hours of prepping and waiting, than cutting into a slice of pie and the filling immediately falls apart and spreads out. We are not interested in making lava cake here, but a firm and structured pie that is still gooey and thick after it comes out of the oven. Here are some tips to help you achieve this in your baking journey:
Cook down about half of your fruit in a saucepan with granulated sugar. You don’t want it to be completely liquid, or even or even a jam, but something on its way to become one. This looks like thick and combined consistency but there are still chunks and visibly whole pieces of fruit in saucepan. Once you’ve reached this point, take the fruit mixture off the heat and allow to cool down for a few minutes.
Next, take the other half of the fruit in a bowl and smash the blueberries gently and just enough to release the juices. This allows for the juices, once combined with the thickening ingredients to create a thicker filling, especially when its baking. Then add in the other ingredients, which typically be flour or cornstarch to solidify the liquid, as well as sugar and lemon for a sweet and tart balance. You one to mix this until it is very well combined, or until you don’t see dry flour or cornstarch.
Pour your jam-like mixture into the bowl and stir until all incorporated.
These tips should help you replicate that thick berry filling that you can just slice your fork right into without it dripping or coming apart.
STYLING THE PIE CRUST
There are so many ways to style a pie crust: lattice, single, braided, cookie cutter, crumbled, etc. This recipe calls for a lattice pie styling, which is the most quintessential look of a pie, but also the most confusing. To help you nail this method, I have provided step-by-step instructions below, with a video tutorial link here from Sally’s Baking Addiction that helped me visualize the steps.
STEP 1
After rolling out one of your discs of pie crust dough into a larger circle than the pie pan, cut 1-inch strips from left to right of the circle. This should give you approximately 10-12 strips. To cut, I recommend using a sharp knife over scissors.
STEP 2
Take six of the strips and lay them vertically and evenly with similar distance between each strip on the pie filling, placing the shorter strips on the edge, and long strips towards the center. The whole pie should be covered with the six strips at this point.
STEP 3
Pull back every other strip on the pie until they are almost falling off the pie (3 strips total) and place an unused strip horizontally and closest to the pulled back edge of the pie. Then place the pulled-back strips back down.
STEP 4
Pull back the other three remaining strips (making sure that its every other one) and place an unused strip horizontally. Then place the pulled-back strips back down. Repeat Steps 3 and 4 until the entire pie is covered in the lattice style.
STEP 5
Cut off excess dough hanging off the pie pan, and tuck back the edges using the index middle finger of one hand and the thumb of the other.

CHERRY AND BLUEBERRY PIE
Ingredients
Instructions
- In a large mixing bowl, combine the flour, sugar, and salt until incorporated. Add the cubes of butter, and either with your fingers (or a pastry cutter if you have one), crumble the butter and dry mixture until you have an almost sand-like texture. It is normal for there to be a few bigger chunks of butter. (Tips: if using fingers to combine, you need to work fast so as not to melt the butter).
- Very slowly start to add the ice water to the mixture, only a little at a time. Stop adding water once the dough starts to come together easily and is not too wet that it can't be kneaded (You may not end up using the entire 1/2 cup of water). You will know it's the right consistency if the dough is together, even if a little sticky, but not wet.
- On a lightly floured surface and with floured hands, knead the dough until it forms into a ball (the flour you use should remove any remaining stickiness and give you a generally firm dough). Divide the dough into two balls.
- Flatten each ball into 1-inch-thick disc and wrap each one tightly in plastic wrap. Refrigerate for minimum of 3 hours before rolling out.
- Take half of the blueberries/cherries and set aside in a medium bowl, and pour the remainder into a saucepan with 1-2 tablespoons granulated sugar and cook down on medium low until a jam begins to form. Once there is a good jam consistency, take off heat and set aside to cool.
- In the other bowl of fresh berries, add the sugar, flour, cornstarch, lemon juice, and lemon zest until well-combined wet in consistency. Smashing some of the blueberries is recommend when combining everything.
- Combine the fresh berry mixture and jam mixture. Set aside
- Preheat oven to 425°F and butter your pie pan well to avoid sticking.
- Take the chilled dough discs out of the refrigerator and roll each disc out, starting from the center and working your way to the edge. Repeat this around the circumference of the disc until the dough is larger than you pie pan. (Tip: make sure dough remains about 1/4-1/2 inch thick and roll gently to avoid doesn't crack).
- To place the first rolled out disc in the pie pan, take the rolling pan and roll up the dough. Then roll it back out onto the pie pan. Gently guide the dough into the pan shape and trim any leftover dough hanging on the sides of the pan. To form the classic pie crust edges, use your index and middle finger to form a V shape, and the thumb of your other hand to tuck in the edges of the crust.
- Pour in your filling and spread evenly.
- For a lattice style pie, let's prepare the strips: roll out the second disc the same as the first, and cut strips with a knife about 1/2-1 inch thick from left to right of the disk. Divide the strips into two equal sections. Take the first group of strips and place them vertically on top of the pie filling, using the longer strips for the center and the short for the edge. Fold every other strip back and place a strips horizontally on top. fold back the strips. Then, fold the next strips that were not originally folded, and lay one of the unused strips on top, then fold back. Repeat this process until you have the lattice style covering the whole pie.
- Cut off the excess dough hanging, and tuck back edges for a clean look. For the final touch, take the beaten egg wash and brush on top of the pie gently. Sprinkle the brown sugar over the pie.
- Refrigerate the pie for 30 minutes prior to baking. Once cooled, bake the pie initially for 25-30 minutes on 425 degrees, then lower temperature to 375 degrees and continue baking for 30-40 minutes, or until the filling is bubbling and the crust is gold brown.
- If you have the patience, let the pie cool for 3 hours before serving. Enjoy!